Scheduling & Auto-Posting
Schedule your content once, publish everywhere. Connect your accounts, pick the platforms for each post, and let EchoMe auto-publish at the exact time you choose, all from inside your Content Kits.
4 min read · Video walkthrough below
Auto-posting to Instagram, LinkedIn, Facebook, Threads, YouTube, and Bluesky unlocks at Echo Studio ($87/mo). On Free and Echo plans you can still schedule posts and get email reminders at the scheduled time. X, TikTok, Pinterest, and Google Business stay copy-and-open (we pre-fill the caption and open the native composer).
Connect your social accounts first
Head to Settings → Connections. You’ll see a card for each supported platform. Click Connect and authorize EchoMe inside a popup window. Your account stays linked until you disconnect it.
- Instagram: Business or Creator account required (Meta doesn’t allow API posting to personal profiles).
- LinkedIn: Personal profile orCompany Pages both work. If you manage multiple pages, you’ll get to pick which ones during connect.
- Facebook: Facebook Page (Meta requires business Pages for API posting; personal profiles aren’t supported by the platform).
- Threads: connect directly. Requires a Threads account linked to an Instagram Business or Creator account.
- YouTube: EchoMe publishes your edited clips as YouTube Shorts (vertical video, up to 3 minutes). No subscriber requirement.
- Bluesky: connect through the same popup authorization flow as the platforms above. Short-form posts, up to 300 characters.
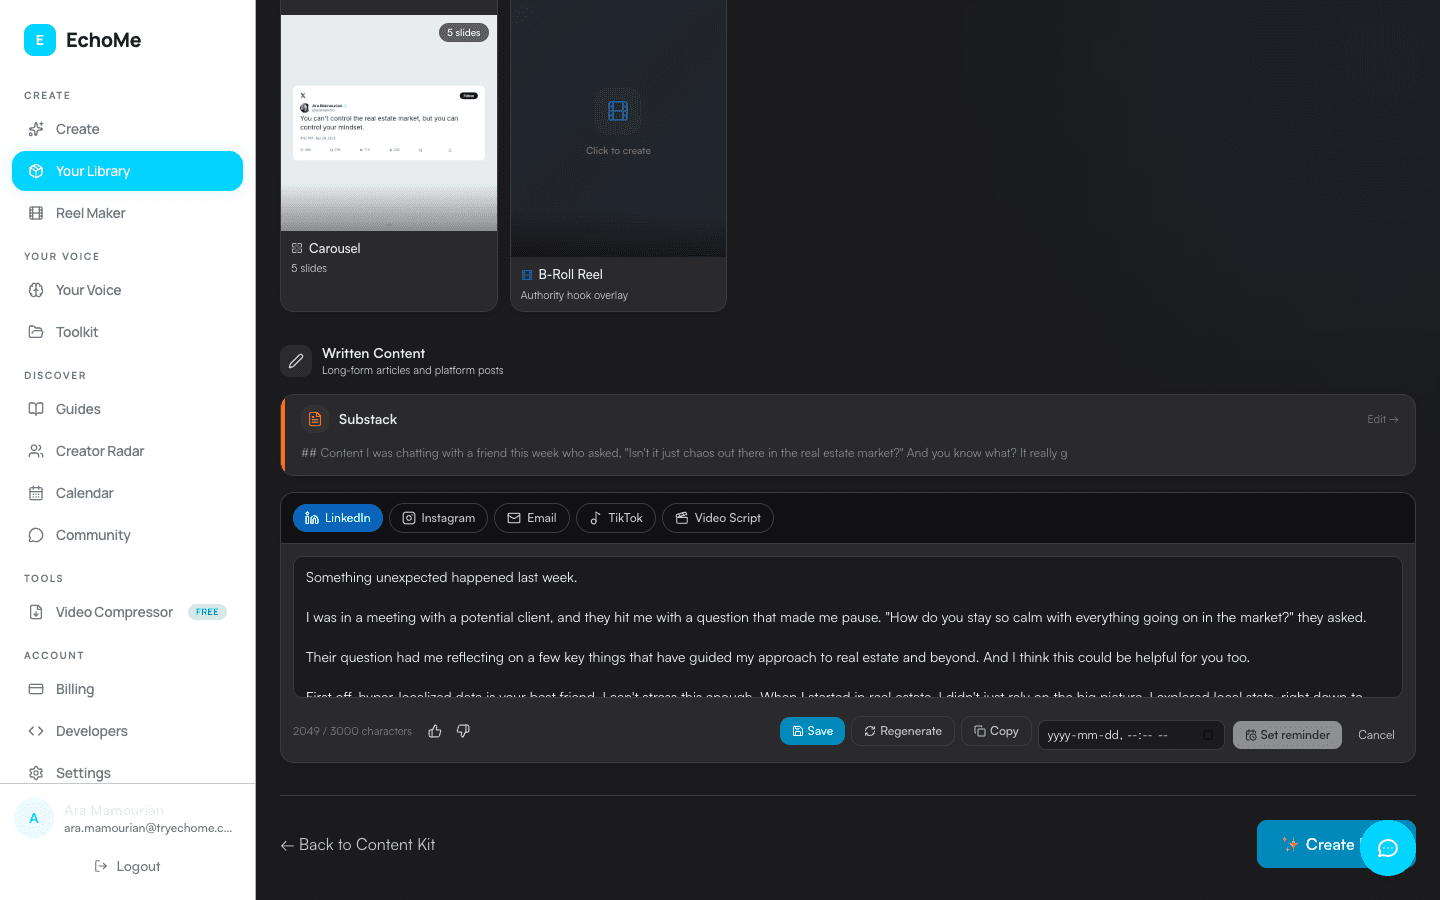
Open a Content Kit and pick a clip or carousel
From your Content Kit, click into any clip, carousel, or reel. This opens the editor where you’ll see the video with burned-in captions, the suggested caption copy, and the platform picker.
Each clip gets its own tailored caption and its own position/style settings. If you want to move the caption overlay around or restyle it, do that before posting. Your edits get burned into the final video.
Pick the platforms you want to post to
At the bottom of the clip editor you’ll see Post to. Tap the platforms you want this specific piece to go to. Connected platforms light up white; unsupported or unconnected ones stay dimmed with a coming-soon feel.
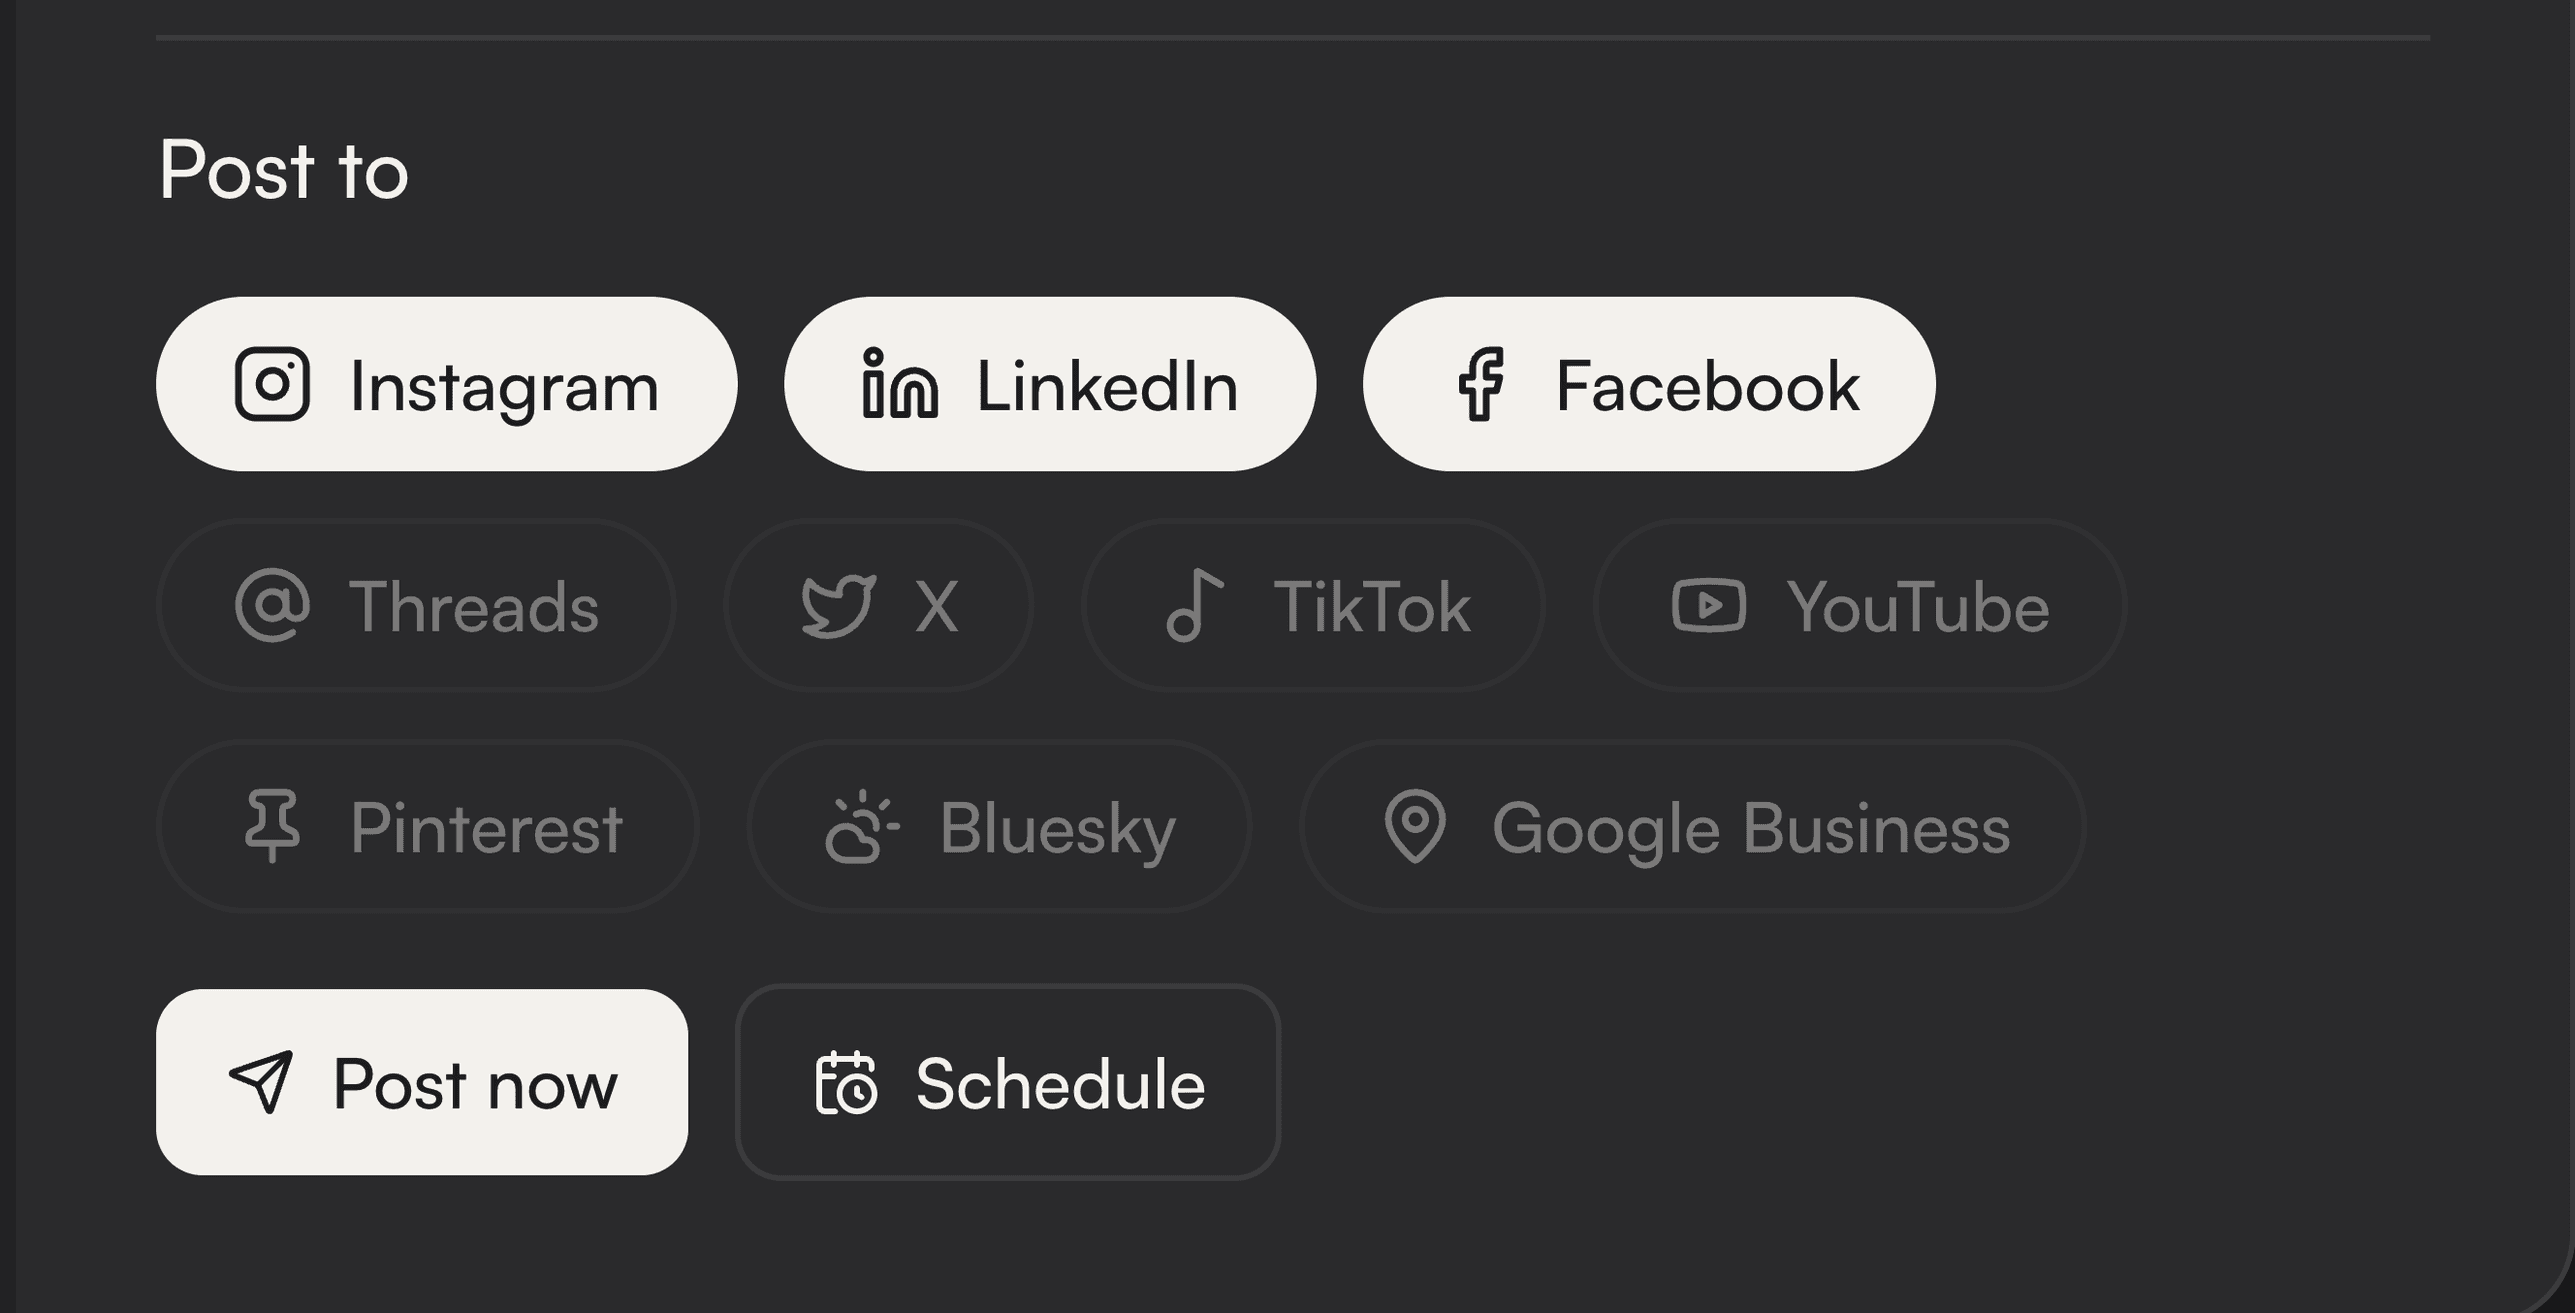
You can send the same piece to one platform, two, or all six at once. Each platform gets its own row in the calendar so you can act on them individually later.
Post now, or schedule for later
Two buttons. Pick one:
- Post now: publishes immediately on each selected platform. You’ll get a confirmation toast once it’s queued, and the post will show up on your profile within a minute or so.
- Schedule: opens a date/time picker. Pick any future time, hit Confirm schedule, and EchoMe takes it from there.
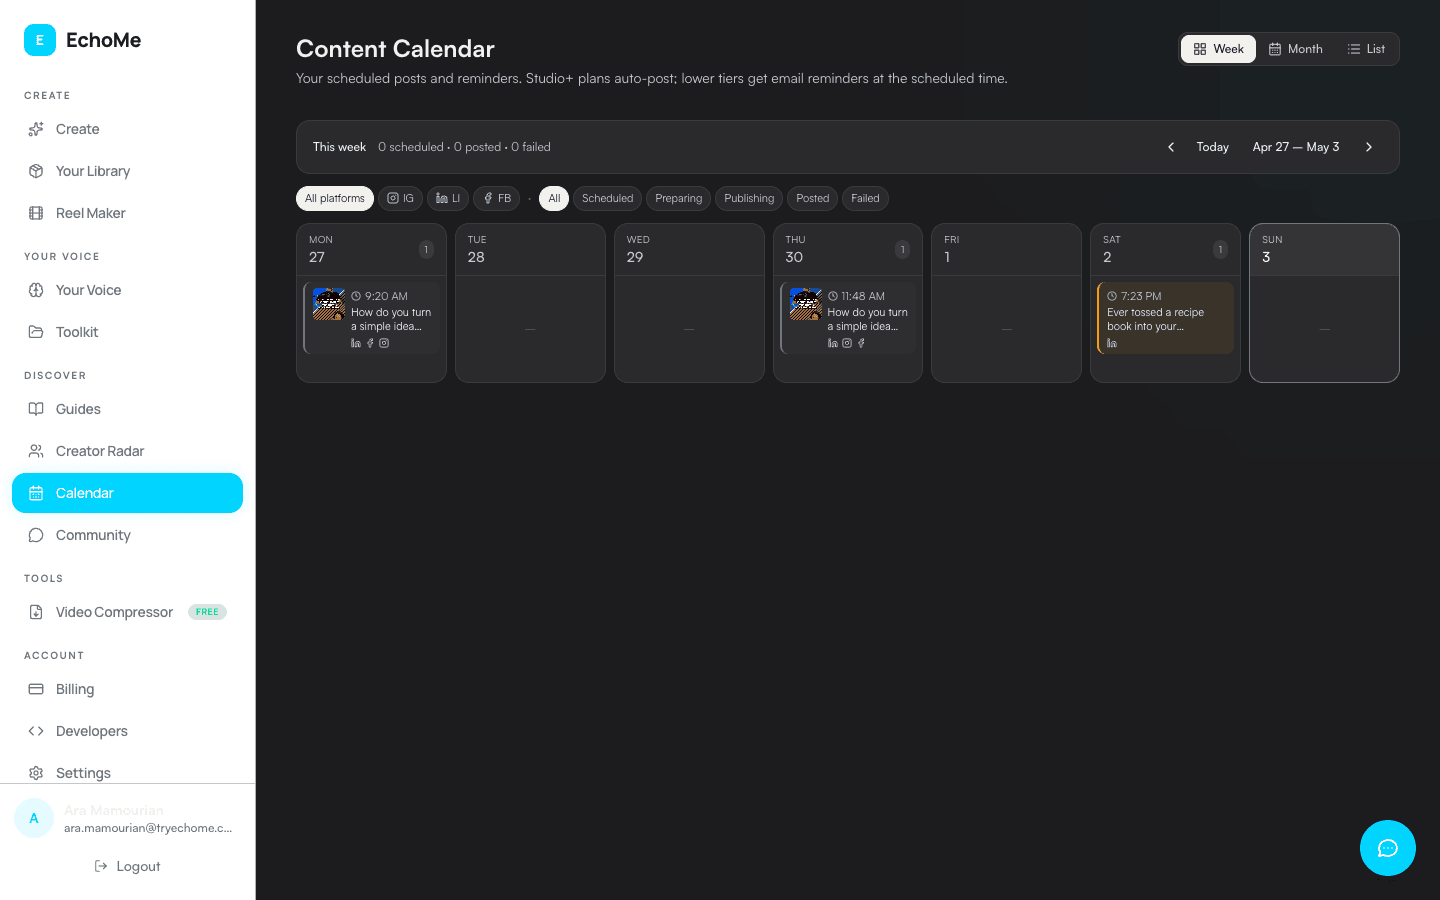
Track everything in the Content Calendar
Open Calendarin the sidebar. Every scheduled piece shows up in the week or month view, color-coded by which Content Kit it came from. Each card shows tiny platform icons that tell you exactly what’s happening per platform.
Right after you schedule, the card will show “Preparing media.” That’s EchoMe finalizing your captioned video or composited carousel behind the scenes. Usually takes under a minute. Once it’s ready, the state flips to Scheduled, and at your chosen time it publishes and flips to Posted.
Manage, retry, or dismiss posts from the calendar
Click any card on the calendar to open its detail view. From there you can:
- Cancel a scheduled or preparing post before it goes out.
- Retry a failed post, useful if a platform-side issue (Meta verification, rate limit) cleared after your first attempt.
- Dismiss a failed or completed row to hide it from your calendar without losing the audit record.
- Dismiss the whole event with one click from the modal header.
If your calendar header shows a red N failedcounter, click it. You’ll get a side panel listing every failed post with Dismiss and Dismiss all so you can clear stale issues in one click.
Drag to reschedule, or spread content across a week
On the week view you can drag a scheduled event to a different day and EchoMe re-times every platform in that fanout together. Great for shuffling a plan after your week starts.
For bigger rollouts, use the AI Schedulebutton on any Content Kit to staggered-post a full week of content from one kit with a single click. (Another layer of this is coming soon, you’ll love it.)
Ready to never worry about content again?
Start Free: 5 GenerationsNo credit card required.